Update documentation for integrating with Helium |
||
|---|---|---|
| .github/workflows | ||
| cayenne | ||
| docker | ||
| gradle/wrapper | ||
| tools | ||
| ttnhabbridge | ||
| workspace | ||
| .gitignore | ||
| .travis.yml | ||
| Dockerfile | ||
| LICENSE | ||
| README.md | ||
| build.gradle | ||
| dependencies.gradle | ||
| gradlew | ||
| gradlew.bat | ||
| settings.gradle | ||
README.md
ttnhabbridge
Bridge between TheThingsNetwork/Helium and the habitat network, to receive telemetry from amateur balloons using LoRaWAN
See https://revspace.nl/TTNHABBridge for a more detailed description of this project. See https://travis-ci.org/bertrik/ttnhabbridge for the Travis CI status
Development environment
I develop this on in Java 11 in Eclipse.
Steps to install everything:
- download a Java 11 JDK and put it in tools/jdk
- download Eclipse and put in in the tools/eclipse directory (for example)
Steps to prepare the Eclipse environment:
- open a command line to the checked out project, enter the 'ttnhabbridge' directory
- type 'env.bat' to initialise the tool paths etc
- type 'gradlew eclipse' and watch dependencies being downloaded from the internet
- start Eclipse, using the 'workspace' directory as workspace
- import sub-projects (ttnhabbridge, cayenne) into the workspace
Steps to update source code from github:
- in the top-level 'ttnhabbridge' directory, enter 'git pull'
Steps to create the executable package:
- in the root directory of the project, type './gradlew assemble' (or just 'gradlew assemble' on Windows)
- the .tar (for Linux) and .zip (for Windows) file can be found under ttnhabbridge/build/distributions
Deployment
Steps to deploy the application:
- unzip the .zip or .tar file
- cd into the application directory
- start the .bat or .sh file, if no .yaml configuration file exists, a default one is generated
- edit and install the systemd service file, if desired (instructions inside the .service file)
Usage with Helium Network
The key difference between using The Things Network and the Helium Network MQTT integration is The Things Network hosts their packet broker, while the helium network does not. Therefore, we have to setup our own packet broker, and get Helium to and TTNhabbridge to connect to it. Here are a few steps on how to do it.
- Setup a MQTT packet broker on machine with port 1883 open to the internet. Docker is the simplest way to do it. Run the following command, changing the
<username>and<secret_password>password fields to something secret :
docker run \
    --name mosquitto \
    -d \
    -p 1883:1883 \
    -p 9883:9883 \
    -e MQTT_USERNAME=<username> \
    -e MQTT_PASSWORD=<secret_password> \
    cburki/mosquitto:latest
-
Now make Helium to speak with the MQTT broker in the earlier step. To do that, first add a label to your tracker device registration. In this case, it has been labeled
icspace26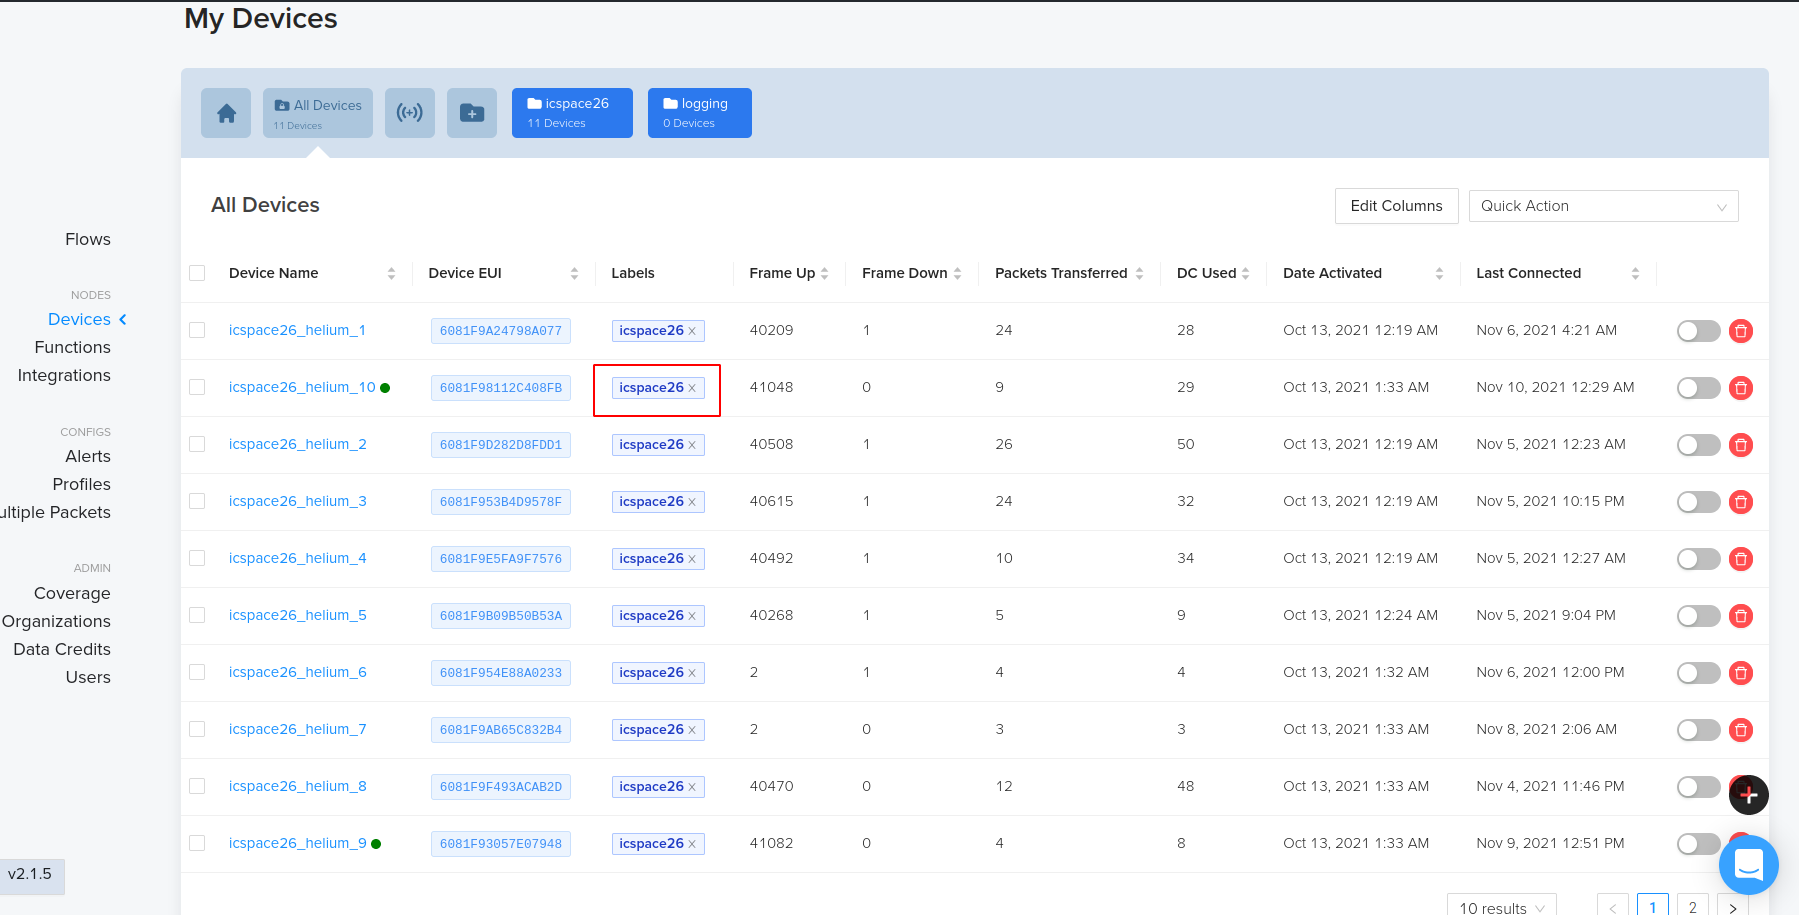
-
Next in your integrations tab, make a new MQTT integration. Your endpoint address should be in the format
mqtt://<username>:<secret_password>@your-ip-or-domain.com:1883. Your<username>and<secret_password>fields should be the same as the ones your set in step 1.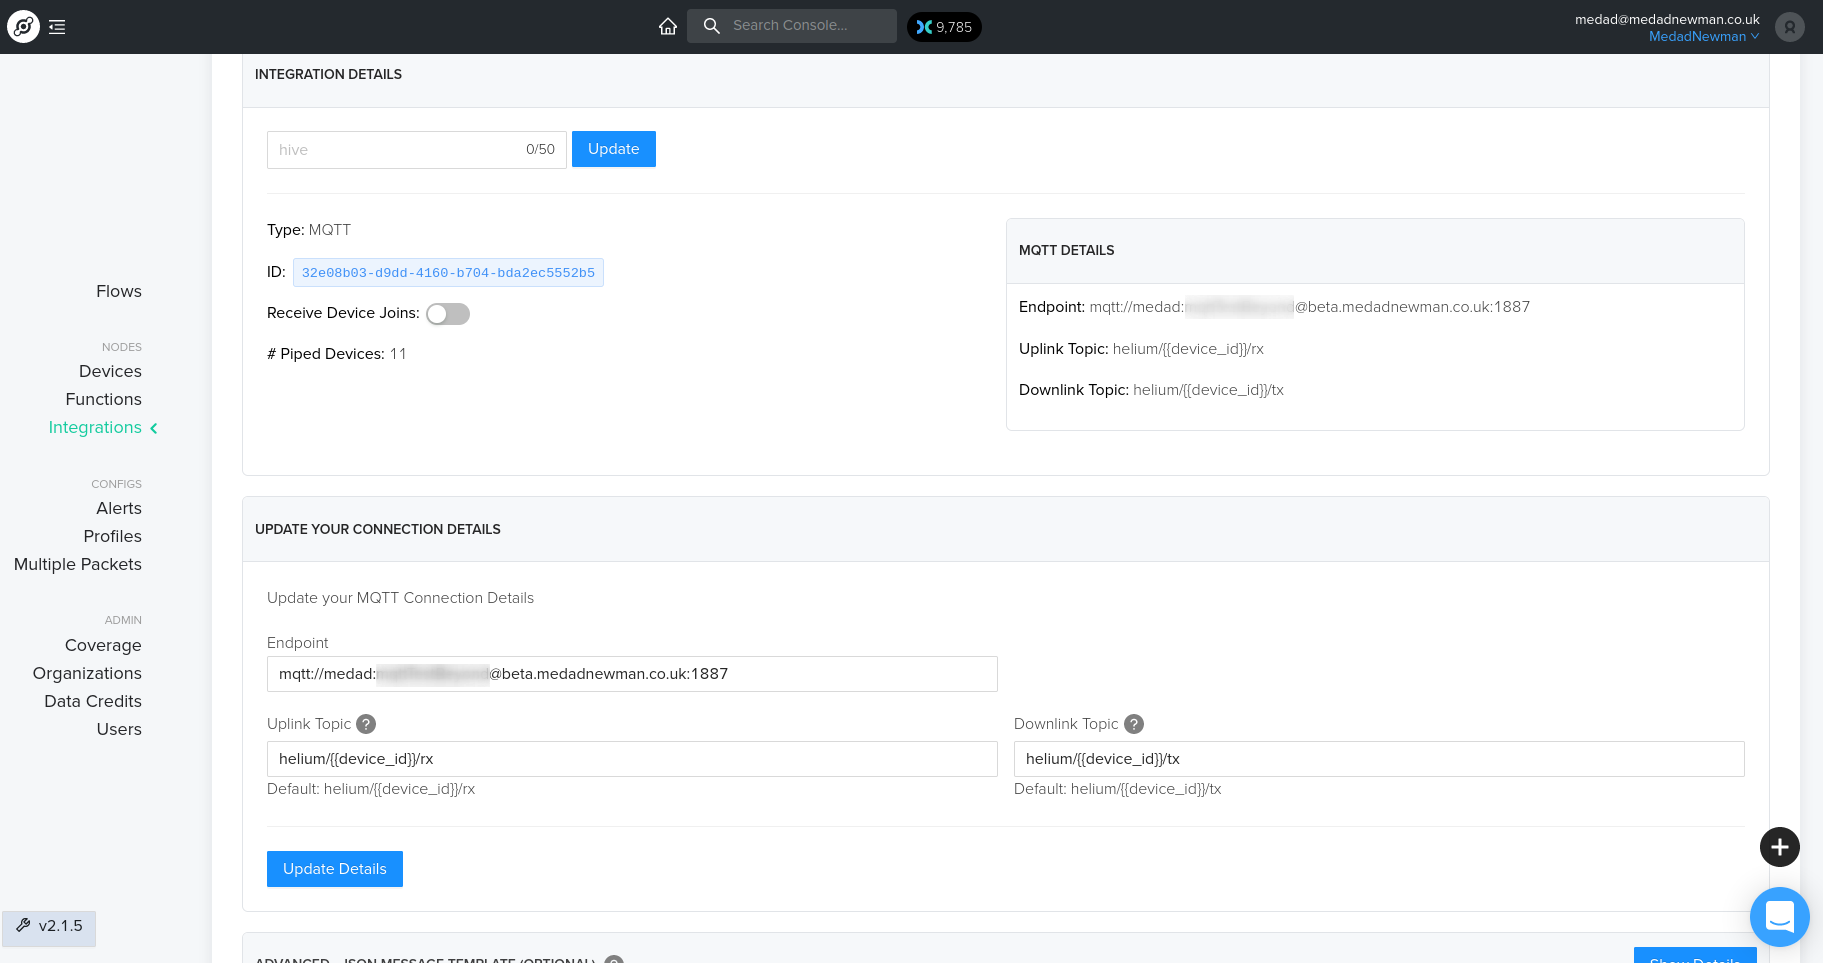
-
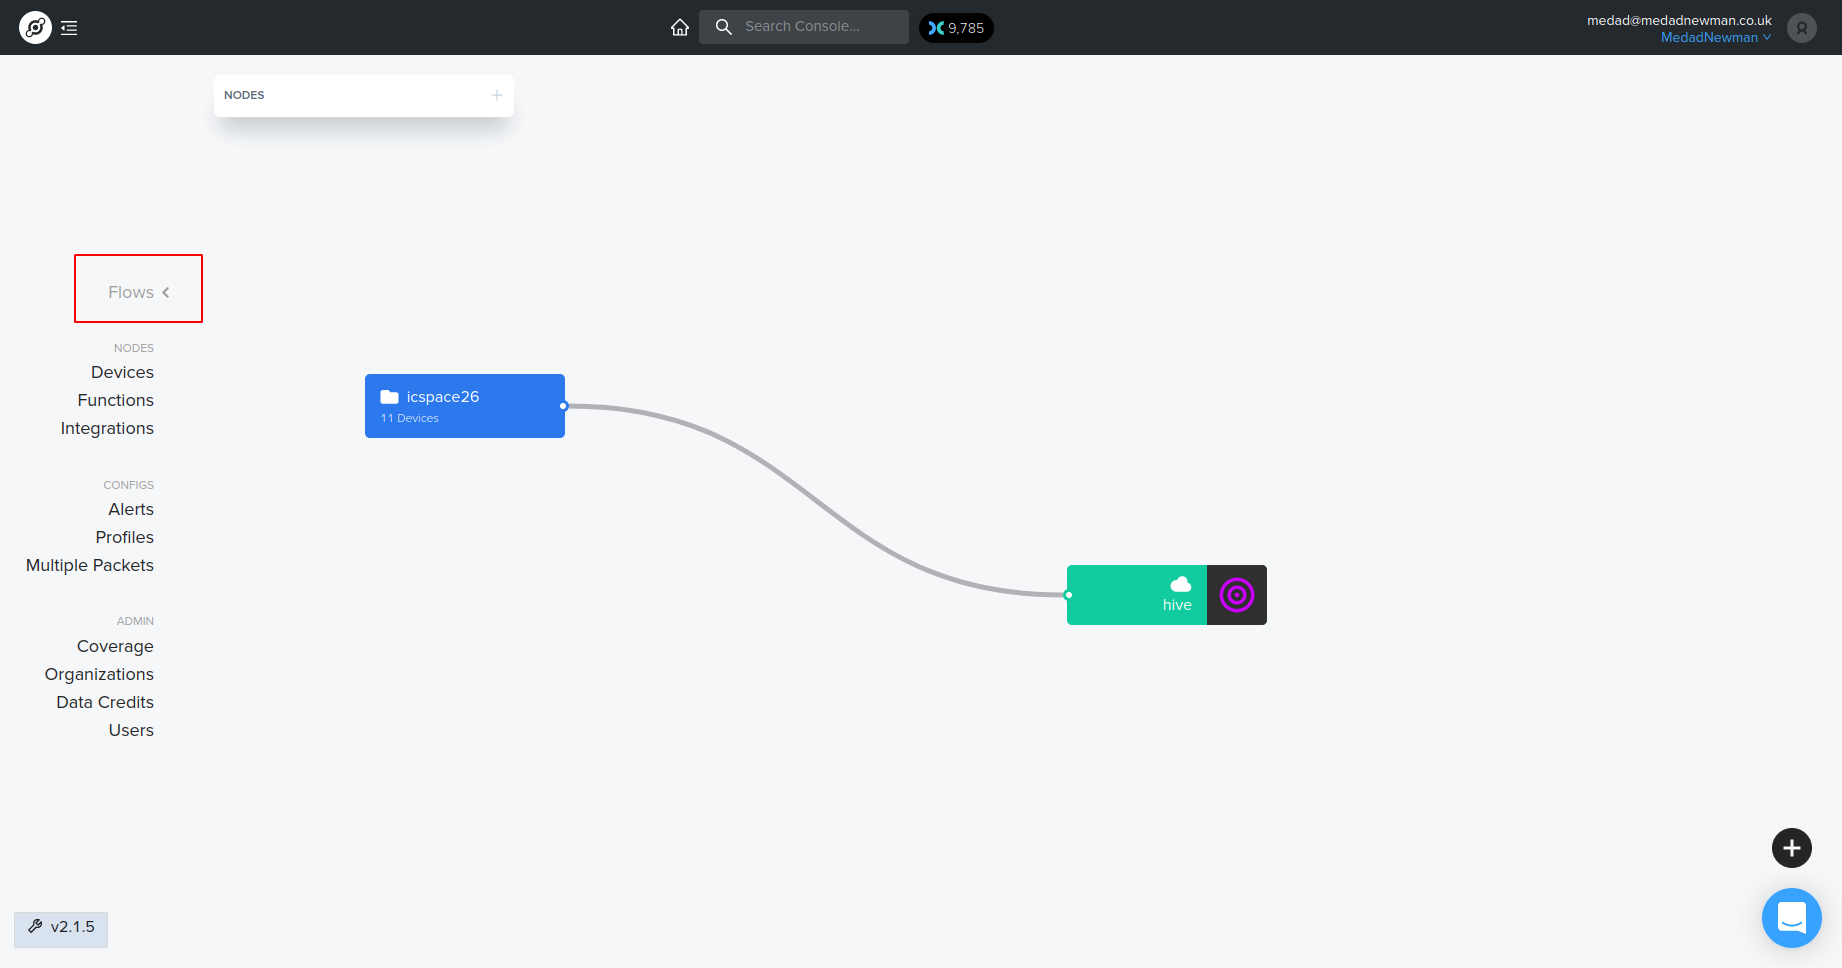
Next, head over to the
flowstab and connect the label box with the mqtt integrations box. You should immediately see some data appearing on your MQTT packet broker log. This will be log data from Helium servers connecting with your packet broker. The log entries would look like this:
mosquitto_1     | 1650374268: New connection from 52.8.80.146 on port 1883.
mosquitto_1     | 1650374268: New client connected from 52.8.80.146 as 8fda71a3-be09-44b0-b3b0-611fb5a54de2 (p2, c0, k30, u'medad').
- Finally, update the
ttnhabbridge.yamlwith your MQTT packet broker's address and credentials. Helium will publish incoming messages to your MQTT broker. TTNhabbridge will subscribe to your broker, repackage messages and post it on Habhub. An examplettnhabridge.yamlfile looks like this:
---
thethingsnetwork:
  url: "tcp://eu1.cloud.thethings.network"
  user: "icss-lora-tracker@ttn"
  pass: "NNSXS.JDUJCMUYUNDVPIOZ53TN6GBTT2P74NBH5FZXYXQ.OCWSRRQ4E46M5OMNATY35GJ6lkaBH6MOWZ5QFP32DMLP823S6M2A"
  topic: "v3/+/devices/+/up"
helium:
  url: "tcp://beta.medadnewman.co.uk:1887"
  user: "medad"
  pass: "secret_password"
  topic: "helium/+/rx"
habitat:
  url: "http://habitat.habhub.org"
  timeout: 60
gwCacheExpirationTime: 600
payloadEncoding: "cayenne"