kopia lustrzana https://github.com/skuep/AIOC
3.7 KiB
3.7 KiB
AIOC
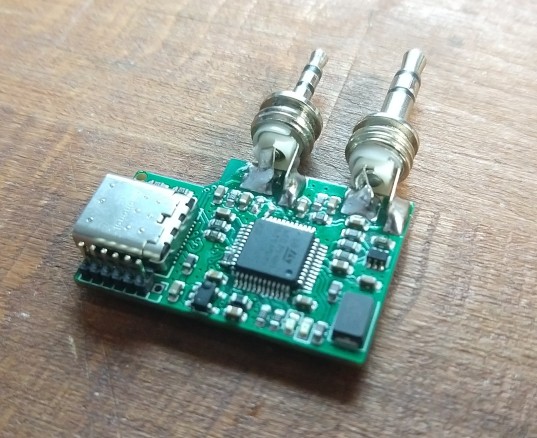
This is the Ham Radio All-in-one-Cable.
What does it do?
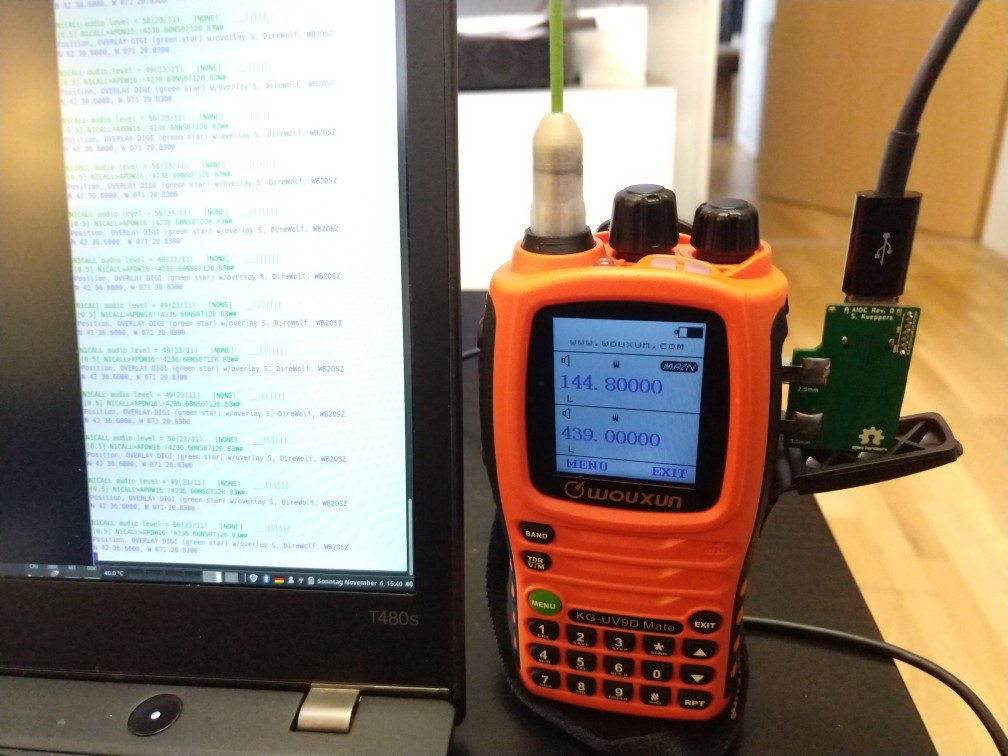
The AIOC is a small adapter with a USB-C connector that enumerates itself as a sound-card (e.g. for APRS purposes) and a virtual tty ("COM Port") for programming and asserting the PTT (Push-To-Talk).
Features
- Digital mode interface (similar to digirig)
- Programming Cable Function via virtual Serial Port
- Compact form-factor (DIY molded enclosure TBD)
- Based on easy-to-handle STM32F302 using internal ADC/DAC (you can program these without any additional tools using DFU
- Tested with Wouxun UV-9D Mate and Baofeng UV-5R
- Works with Direwolf (Notes on APRSdroid below)
Future Work
- Enclosure (DIY using 3D-Printed mold and Resin)
- Maybe integrate a TNC Modem with KISS interface? (I am not sure if that is worth the effort)
How To Fab
- Go to JLCPCB.com and upload the GERBER-k1-aioc.zip package (under
kicad/k1-aioc/jlcpcb)- Select PCB Thickness 1.2mm (that is what I recommend with the TRS connectors I used)
- You may want to select LeadFree HASL
- Select Silkscreen/Soldermask color to your liking
- Check "PCB Assembly"
- PCBA Type "Economic"
- Assembly Side "Top Side"
- Tooling Holes "Added by Customer"
- Press Confirm
- Click "Add BOM File" and upload
BOM-k1-aioc.csv - Click "Add CPL File" and upload
POS-k1-aioc.csv - Press Next
- Look Through components, see if something is missing or problematic and press Next
- Check everything looks good and Save to Cart
How To Build
- You need to use Monacor PG-204P and PG-203P or compatible TRS connectors (2 solder lugs and a big tab for the sleeve connection)
- Cut the 2.5mm and 3.5mm TRS sleeve tab where the hole is located
- Put both TRS connectors into the solder guide (or a cheap HT that you don't mind potentially damaging). Make sure, that they are seated all the way in
- Solder sleeve tab on the back side for both TRS connectors first
- Turn around PCB and solder remaining solder lugs
How To Program
- Short outermost pins on the programming header. This will set the device into bootloader mode in the next step.
- Connect USB-C cable to the AIOC PCB
- Use a tool like dfu-util to program the Release Binary like this (see more information at https://yeswolf.github.io/dfu/):
dfu-util -a 0 -s 0x08000000 -D aioc-fw.bin - Unplug and replug the device, it should now enumerate as the AIOC device
How To use with Direwolf for APRS
- Follow the regular setup guide with direwolf to determine the correct audio device to use
- Configure the device as follows
[...]
ADEVICE  plughw:<x>,0
ARATE 48000
[...]
PTT /dev/ttyACM0 RTS -DTR
[...]
How To use with CHIRP for programming
- Start CHIRP
- Select Radio->Download from Radio
- Select the new COM/ttyACM port and start
Notes on APRSdroid
Although theoretically not an issue, currently APRSdroid is not supported due to the following two issues:
- According to https://github.com/ge0rg/aprsdroid/issues/156 the sample-rate is fixed to 22050 Hz. Currently, only 48000 Hz is supported by the AIOC (and 24000 Hz or 12000 Hz would be possible to implement). However the required hard-coded 22050 Hz would require a different timebase or resampling and is thus not possible unfortunately
- Currently APRSdroid does not support any PTT control via a serial interface. See https://github.com/ge0rg/aprsdroid/issues/324 However my previous experience is, that the Android kernel brings support for ttyACM devices (which is perfect) so implementing this feature should be no problem.

