merge rotation functions into one (always returns final state) rename EXPOSE_EXTRA_METHODS to ST77XX_EXPOSE_EXTRA_METHODS |
||
|---|---|---|
| docs | ||
| st77xx | ||
| .gitignore | ||
| LICENSE | ||
| README.md | ||
| VERSION | ||
README.md
ST77xx Driver for MicroPython
Overview
This is a driver for MicroPython to handle cheap displays based on ST77xx chip.
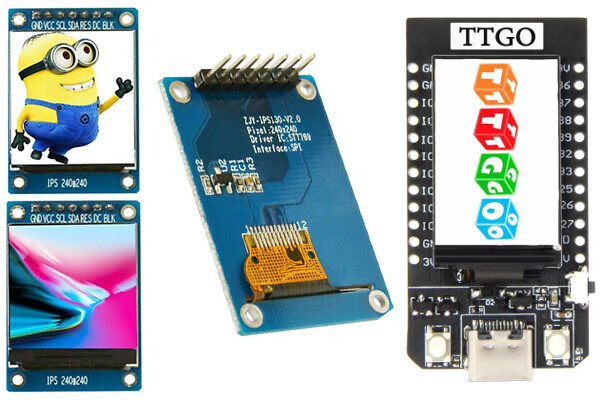
It supports 80x160, 240x240 and 135x240 variants of displays.
It is written in pure C, so you have to build firmware by yourself. ESP8266, ESP32, and STM32 ports are supported for now.
Building instruction
Prepare build tools as described in the manual. You should follow the instruction for building MicroPython and ensure that you can build the firmware without this display module.
Clone this module alongside the MPY sources:
$ git clone https://github.com/nexus166/st77xx_mpy.git
Go to MicroPython ports directory and for ESP8266 run:
$ cd micropython/ports/esp8266
for ESP32:
$ cd micropython/ports/esp32
And then compile the module with specified USER_C_MODULES dir
$ make USER_C_MODULES=../../../st77xx_mpy/ all
If you have other user modules, copy the st77xx_driver/st77xx to the user modules directory
Upload the resulting firmware to your MCU as usual with esptool.py (See MicroPython docs for more info)
$ make deploy
Working examples
This module was tested on ESP32 and ESP8266 MCUs.
You have to provide machine.SPI object and at least two pins for RESET and
DC pins on the screen for the display object.
    # ESP 8266

    import machine
    import st77xx
    spi = machine.SPI(1, baudrate=40000000, polarity=1)
    display = st77xx.ST77xx(spi, 240, 240, reset=machine.Pin(5, machine.Pin.OUT), dc=machine.Pin(4, machine.Pin.OUT))
    display.init()
For ESP32 modules you have to provide specific pins for SPI. Unfortunately, I was unable to run this display on SPI(1) interface. For machine.SPI(2) == VSPI you have to use
- CLK: Pin(18)
- MOSI: Pin(23)
Other SPI pins are not used.
    # ESP32

    import machine
    import st77xx
    spi = machine.SPI(2, baudrate=40000000, polarity=1, sck=machine.Pin(18), mosi=machine.Pin(23))
    display = st77xx.ST77xx(spi, 240, 240, reset=machine.Pin(4, machine.Pin.OUT), dc=machine.Pin(2, machine.Pin.OUT))
    display.init()
I couldn't run the display on an SPI with baudrate higher than 40MHZ
Also, the driver was tested on STM32 board:
    # STM32

    import machine
    import st77xx
    spi = machine.SPI(2, baudrate=12000000, polarity=1)
    display = st77xx.ST77xx(spi, 135, 240, reset=machine.Pin('B3', machine.Pin.OUT), dc=machine.Pin('B6', machine.Pin.OUT))
    display.init()
This module was also tested on TINYPICO M5StickC/M5StickC+ devices
import machine
import st77xx

tft = None
spi = None
tft_width = None
tft_height = None

def init_screen(isPlus=True):
    global tft
    global spi
    global tft_width
    global tft_height
    rot = None
    xstart = None
    ystart = None
    pol = None
    rgb = None
    """ pre-init """
    if not isPlus:
        x = 0
        y = 25
        rot = 1
        tft_width = 160
        tft_height = 80
        pol = 0
        rgb = 0
    else:
        x = 40
        y = 52
        rot = 3
        tft_width = 240
        tft_height = 135
        pol = 1
        rgb = 1
    """ init """
    if spi is None:
        spi = SPI(2, baudrate=30000000, polarity=pol, sck=Pin(13), mosi=Pin(15), miso=Pin(36))
    if tft is None:
        tft = st77xx.ST77XX(spi, tft_width, tft_height, rot, reset=Pin(18, Pin.OUT, Pin.PULL_DOWN), dc=Pin(23, Pin.OUT, Pin.PULL_DOWN), cs=Pin(5, Pin.OUT, Pin.PULL_DOWN), rgb=rgb, xstart=x, ystart=y)
        tft.init()
    tft.fill(st77xx.BLACK)
Methods
This driver supports only 16bit colors in RGB565 notation.
-
ST77xx.fill(color)Fill the entire display with the specified color.
-
ST77xx.pixel(x, y, color)Set the specified pixel to the given color.
-
ST77xx.line(x0, y0, x1, y1, color)Draws a single line with the provided
colorfrom (x0,y0) to (x1,y1). -
ST77xx.hline(x, y, length, color)Draws a single horizontal line with the provided
colorandlengthin pixels. Along withvline, this is a fast version with reduced number of SPI calls. -
ST77xx.vline(x, y, length, color)Draws a single horizontal line with the provided
colorandlengthin pixels. -
ST77xx.rect(x, y, width, height, color)Draws a rectangle from (
x,y) with corresponding dimensions -
ST77xx.fill_rect(x, y, width, height, color)Fill a rectangle starting from (
x,y) coordinates -
ST77xx.blit_buffer(buffer, x, y, width, height)Copy bytes() or bytearray() content to the screen internal memory. Note: every color requires 2 bytes in the array
-
ST77xx.rotation(n)Configure screen rotation. Takes care of swapping width/height and offset. 0 = no rotation, 1 = 90, 2 = 180, 3 = 270 Without arguments will return current rotation parameter (0..3)
Also, the module exposes predefined colors:
BLACK, BLUE, RED, GREEN, CYAN, MAGENTA, YELLOW, and WHITE
Helper functions
-
color565(r, g, b)Pack a color into 2-bytes rgb565 format
-
map_bitarray_to_rgb565(bitarray, buffer, width, color=WHITE, bg_color=BLACK)Convert a bitarray to the rgb565 color buffer which is suitable for blitting. Bit 1 in bitarray is a pixel with
colorand 0 - withbg_color.This is a helper with a good performance to print text with a high resolution font. You can use an awesome tool https://github.com/peterhinch/micropython-font-to-py to generate a bitmap fonts from .ttf and use them as a frozen bytecode from the ROM memory.
Performance
For the comparison I used an excellent library for Arduino that can handle this screen.
https://github.com/ananevilya/Arduino-ST77xx-Library/
Also, I used my slow driver for this screen, written in pure python.
https://github.com/devbis/st77xxpy_mpy/
I used these modules to draw a line from 0,0 to 239,239 The table represents the time in milliseconds for each case
| Arduino-ST77xx | st77xxpy_mpy | st77xx_mpy | |
|---|---|---|---|
| ESP8266 | 26 | 450 | 12 |
| ESP32 | 23 | 450 | 47 |
As you can see, the ESP32 module draws a line 4 times slower than the older ESP8266 module.
Troubleshooting
Overflow of iram1_0_seg
When building a firmware for esp8266 you can see this failure message from the linker:
LINK build/firmware.elf
xtensa-lx106-elf-ld: build/firmware.elf section `.text' will not fit in region `iram1_0_seg'
xtensa-lx106-elf-ld: region `iram1_0_seg' overflowed by 292 bytes
Makefile:192: recipe for target 'build/firmware.elf' failed
To fix this issue, you have to put st77xx module to irom0 section.
Edit esp8266_common.ld file in the ports/esp8266 dir and add a line
*st77xx/*.o(.literal* .text*)
in the .irom0.text : ALIGN(4) section
Unsupported dimensions
If you have a display with an unsupported resolution, you can pass
xstart and ystart parameters to the display constructor to set the
required offsets.