# AIOC
 This is the Ham Radio *All-in-one-Cable*. **It is currently in beta testing phase - Be wary!** Please read this README carefully before ordering anything.

## What does it do?
The AIOC is a small adapter with a USB-C connector that enumerates itself as a sound-card (e.g. for APRS purposes)
and a virtual tty ("COM Port") for programming and asserting the PTT (Push-To-Talk).
You can watch the videos of the *Temporarily Offline* and *HAM RADIO DUDE* YouTube channels below.
[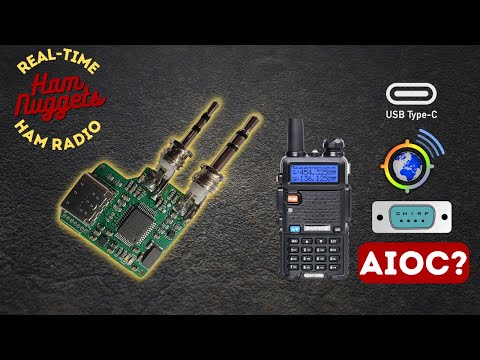](http://www.youtube.com/watch?v=RZjoPNe634o "Video Title")
[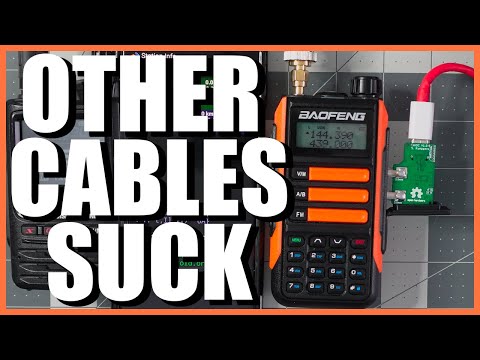](http://www.youtube.com/watch?v=xRCmXQYRLE0 "Video Title")
## Features ##
- Cheap & Hackable Digital mode USB interface (similar to digirig, mobilinkd, etc...)
- Programming Cable Function via virtual Serial Port
- Compact form-factor (DIY overmolded enclosure is currently TBD)
- Based on easy-to-hack STM32F302 with internal ADC/DAC (Programmable via USB bootloader using [DFU](#how-to-program))
- Can support Dual-PTT HTs
## Compatibility
### Software
- [Direwolf](#notes-on-direwolf) as AX.25 modem/APRS en+decoder/...
- [APRSdroid](#notes-on-aprsdroid) as APRS en+decoder
- [CHIRP](#notes-on-chirp) for programming
- ... and more
### Tested Radios (so far)
- Wouxun UV-9D Mate (CHIRP + APRS)
- Baofeng UV-5R (CHIRP + APRS)
- BTECH 6X2 (CHIRP)
## Future Work ##
- Overmolded enclosure design (DIY using 3D-Printed mold and Resin/Hotglue)
- Maybe integrate a TNC Modem with KISS interface? (I am not sure if that is worth the effort)
- "High-Performance" VOX emulation with advanced features (e.g. pre-triggered VOX to activate PTT a few milliseconds before data, reduced tail time)
- HID (maybe CM108 compatible) PTT control

## How To Fab
- Go to JLCPCB.com and upload the GERBER-k1-aioc.zip package (under ``kicad/k1-aioc/jlcpcb``)
- Select PCB Thickness 1.2mm (that is what I recommend with the TRS connectors I used)
- You may want to select LeadFree HASL
- Select Silkscreen/Soldermask color to your liking
- Check "PCB Assembly"
- PCBA Type "Economic"
- Assembly Side "Top Side"
- Tooling Holes "Added by Customer"
- Press Confirm
- Click "Add BOM File" and upload ``BOM-k1-aioc.csv``
- Click "Add CPL File" and upload ``CPL-k1-aioc.csv``
- Press Next
- Look Through components, see if something is missing or problematic and press Next
- Check everything looks roughly good (rotations are already baked-in and should be correct). Save to Cart
This gives you 5 (or more) SMD assembled AIOC. The only thing left to do is soldering on the TRS connectors (see [here](#how-to-build)).
The total bill should be around 60$ US for 5 pieces plus tax and shipping from China.
## How To Assemble
This is the process I use for building. See photographs in ``images`` folder.
- You need to use Monacor PG-204P and PG-203P or compatible TRS connectors (2 solder lugs and a big tab for the sleeve connection)
- Cut the 2.5mm and 3.5mm TRS sleeve tab where the hole is located
- Put both TRS connectors into the 3d-printed solder guide (or a cheap HT that you don't mind potentially damaging). Make sure, that they are seated all the way in. If the holes in the solder guide are too small, you can ream them using a 2.5mm and 3.5mm drill bit.
- Insert the AIOC PCB into the solder guide
- Solder sleeve tab on the back side for both TRS connectors first
- Turn around PCB and solder remaining solder lugs
## How To Build
For building the firmware, clone the repository and initialize the submodules. Create an empty workspace with the STM32CubeIDE and import the project.
- ``git clone ``
- ``git submodule update --init``
- Start STM32CubeIDE and create a new workspace under ``/stm32``
- Choose File->Import and import the ``aioc-fw`` project in the same folder without copying
- Select Project->Build All and the project should build. Use the Release build unless you specifically want to debug an issue
## How To Program
- Short outermost pins on the programming header. This will set the device into bootloader mode in the next step.
- Connect USB-C cable to the AIOC PCB
- Use a tool like ``dfu-util`` to program the firmware binary from the GitHub Releases page like this:
````
dfu-util -a 0 -s 0x08000000 -D aioc-fw-x-y-z.bin
````
__Note__ that a ``libusb`` driver is required for this. On Windows there are additional steps required as shown [here](https://yeswolf.github.io/dfu) (*DFuSe Utility and dfu-util*). On other operating systems (e.g. Linux, MacOS), this just works ™ (provided libusb is installed on your system).
- Remove short from first step, unplug and replug the device, it should now enumerate as the AIOC device
## How To Use
The serial interface of the AIOC enumerates as a regular COM (Windows) or ttyACM port (Linux) and can be used as such for programming the radio as well as PTT (Asserted on ``DTR=1``).
The soundcard interface of the AIOC gives access to the audio data channels. It has one mono microphone channel and one mono speaker channel and currently supports the following baudrates:
- 48000 Hz (preferred)
- 24000 Hz
- 22050 Hz (specifically for APRSdroid, has approx. 90 ppm of frequency error)
- 12000 Hz
- 11025 Hz (has approx. 90 ppm of frequency error)
- 8000 Hz
USB HID based PTT control (and general configuration of the AIOC) is currently on the idea list. For further discussion go to GitHub issues.
## Notes on Direwolf
- Follow the regular setup guide with direwolf to determine the correct audio device to use
- Configure the device as follows
````
[...]
ADEVICE plughw:,0 # <- Linux
ADEVICE x 0 # <- Windows
ARATE 48000
[...]
PTT DTR
[...]
````
## Notes on APRSdroid
APRSdroid support has been added by AIOC by implementing support for the fixed 22050 Hz sample rate that APRSdroid requires.
It is important to notice, that the exact sample rate can not be achieved by the hardware, due to the 8 MHz crystal.
The actual sample rate used is 22052 Hz (which represents around 90 ppm of error). From my testing this does not seem to be a problem for APRS at all.
However, since APRSdroid does not have any PTT control, sending data is currently not possible using the AIOC. See https://github.com/ge0rg/aprsdroid/issues/324.
My previous experience is, that the Android kernel brings support for ttyACM devices (which is perfect for the AIOC) so implementing this feature for APRSdroid should theoretically be no problem.
Ideas such as implementing a digital-modes-spefic VOX-emulation to workaround this problem and let the AIOC activate the PTT automatically are currently being considered.
Voice your opinion and ideas in the GitHub issues if this seems interesting to you.
## Notes on CHIRP
CHIRP is a very popuplar open-source programming software that supports a very wide array of HT radios. You can use CHIRP just as you would like with a regular programming cable.
Download:
- Start CHIRP
- Select Radio->Download from Radio
- Select the AIOC COM/ttyACM port and start
Upload:
- Select Radio->Upload to Radio
- That's it
This is the Ham Radio *All-in-one-Cable*. **It is currently in beta testing phase - Be wary!** Please read this README carefully before ordering anything.

## What does it do?
The AIOC is a small adapter with a USB-C connector that enumerates itself as a sound-card (e.g. for APRS purposes)
and a virtual tty ("COM Port") for programming and asserting the PTT (Push-To-Talk).
You can watch the videos of the *Temporarily Offline* and *HAM RADIO DUDE* YouTube channels below.
[](http://www.youtube.com/watch?v=RZjoPNe634o "Video Title")
[](http://www.youtube.com/watch?v=xRCmXQYRLE0 "Video Title")
## Features ##
- Cheap & Hackable Digital mode USB interface (similar to digirig, mobilinkd, etc...)
- Programming Cable Function via virtual Serial Port
- Compact form-factor (DIY overmolded enclosure is currently TBD)
- Based on easy-to-hack STM32F302 with internal ADC/DAC (Programmable via USB bootloader using [DFU](#how-to-program))
- Can support Dual-PTT HTs
## Compatibility
### Software
- [Direwolf](#notes-on-direwolf) as AX.25 modem/APRS en+decoder/...
- [APRSdroid](#notes-on-aprsdroid) as APRS en+decoder
- [CHIRP](#notes-on-chirp) for programming
- ... and more
### Tested Radios (so far)
- Wouxun UV-9D Mate (CHIRP + APRS)
- Baofeng UV-5R (CHIRP + APRS)
- BTECH 6X2 (CHIRP)
## Future Work ##
- Overmolded enclosure design (DIY using 3D-Printed mold and Resin/Hotglue)
- Maybe integrate a TNC Modem with KISS interface? (I am not sure if that is worth the effort)
- "High-Performance" VOX emulation with advanced features (e.g. pre-triggered VOX to activate PTT a few milliseconds before data, reduced tail time)
- HID (maybe CM108 compatible) PTT control

## How To Fab
- Go to JLCPCB.com and upload the GERBER-k1-aioc.zip package (under ``kicad/k1-aioc/jlcpcb``)
- Select PCB Thickness 1.2mm (that is what I recommend with the TRS connectors I used)
- You may want to select LeadFree HASL
- Select Silkscreen/Soldermask color to your liking
- Check "PCB Assembly"
- PCBA Type "Economic"
- Assembly Side "Top Side"
- Tooling Holes "Added by Customer"
- Press Confirm
- Click "Add BOM File" and upload ``BOM-k1-aioc.csv``
- Click "Add CPL File" and upload ``CPL-k1-aioc.csv``
- Press Next
- Look Through components, see if something is missing or problematic and press Next
- Check everything looks roughly good (rotations are already baked-in and should be correct). Save to Cart
This gives you 5 (or more) SMD assembled AIOC. The only thing left to do is soldering on the TRS connectors (see [here](#how-to-build)).
The total bill should be around 60$ US for 5 pieces plus tax and shipping from China.
## How To Assemble
This is the process I use for building. See photographs in ``images`` folder.
- You need to use Monacor PG-204P and PG-203P or compatible TRS connectors (2 solder lugs and a big tab for the sleeve connection)
- Cut the 2.5mm and 3.5mm TRS sleeve tab where the hole is located
- Put both TRS connectors into the 3d-printed solder guide (or a cheap HT that you don't mind potentially damaging). Make sure, that they are seated all the way in. If the holes in the solder guide are too small, you can ream them using a 2.5mm and 3.5mm drill bit.
- Insert the AIOC PCB into the solder guide
- Solder sleeve tab on the back side for both TRS connectors first
- Turn around PCB and solder remaining solder lugs
## How To Build
For building the firmware, clone the repository and initialize the submodules. Create an empty workspace with the STM32CubeIDE and import the project.
- ``git clone ``
- ``git submodule update --init``
- Start STM32CubeIDE and create a new workspace under ``/stm32``
- Choose File->Import and import the ``aioc-fw`` project in the same folder without copying
- Select Project->Build All and the project should build. Use the Release build unless you specifically want to debug an issue
## How To Program
- Short outermost pins on the programming header. This will set the device into bootloader mode in the next step.
- Connect USB-C cable to the AIOC PCB
- Use a tool like ``dfu-util`` to program the firmware binary from the GitHub Releases page like this:
````
dfu-util -a 0 -s 0x08000000 -D aioc-fw-x-y-z.bin
````
__Note__ that a ``libusb`` driver is required for this. On Windows there are additional steps required as shown [here](https://yeswolf.github.io/dfu) (*DFuSe Utility and dfu-util*). On other operating systems (e.g. Linux, MacOS), this just works ™ (provided libusb is installed on your system).
- Remove short from first step, unplug and replug the device, it should now enumerate as the AIOC device
## How To Use
The serial interface of the AIOC enumerates as a regular COM (Windows) or ttyACM port (Linux) and can be used as such for programming the radio as well as PTT (Asserted on ``DTR=1``).
The soundcard interface of the AIOC gives access to the audio data channels. It has one mono microphone channel and one mono speaker channel and currently supports the following baudrates:
- 48000 Hz (preferred)
- 24000 Hz
- 22050 Hz (specifically for APRSdroid, has approx. 90 ppm of frequency error)
- 12000 Hz
- 11025 Hz (has approx. 90 ppm of frequency error)
- 8000 Hz
USB HID based PTT control (and general configuration of the AIOC) is currently on the idea list. For further discussion go to GitHub issues.
## Notes on Direwolf
- Follow the regular setup guide with direwolf to determine the correct audio device to use
- Configure the device as follows
````
[...]
ADEVICE plughw:,0 # <- Linux
ADEVICE x 0 # <- Windows
ARATE 48000
[...]
PTT DTR
[...]
````
## Notes on APRSdroid
APRSdroid support has been added by AIOC by implementing support for the fixed 22050 Hz sample rate that APRSdroid requires.
It is important to notice, that the exact sample rate can not be achieved by the hardware, due to the 8 MHz crystal.
The actual sample rate used is 22052 Hz (which represents around 90 ppm of error). From my testing this does not seem to be a problem for APRS at all.
However, since APRSdroid does not have any PTT control, sending data is currently not possible using the AIOC. See https://github.com/ge0rg/aprsdroid/issues/324.
My previous experience is, that the Android kernel brings support for ttyACM devices (which is perfect for the AIOC) so implementing this feature for APRSdroid should theoretically be no problem.
Ideas such as implementing a digital-modes-spefic VOX-emulation to workaround this problem and let the AIOC activate the PTT automatically are currently being considered.
Voice your opinion and ideas in the GitHub issues if this seems interesting to you.
## Notes on CHIRP
CHIRP is a very popuplar open-source programming software that supports a very wide array of HT radios. You can use CHIRP just as you would like with a regular programming cable.
Download:
- Start CHIRP
- Select Radio->Download from Radio
- Select the AIOC COM/ttyACM port and start
Upload:
- Select Radio->Upload to Radio
- That's it